Hi Everyone
The site has now moved to self hosted - Yay! You can now find us at www.polkadottedtiffany.com
I hope you will join the site over there!
Tuesday 18 March 2014
Sunday 9 March 2014
Carrot Cake with Cream Cheese Icing (Incl. recipe)


My parents came down this weekend and we took them out for brunch as an early birthday treat for my Mums birthday. I also made her a carrot cake which after brunch and then a walk down the seafront, we came back and ate a slice of with a cup of tea. I used a Mary Berry recipe for the sponge and for the icing a recipe from the BBC Good Food website.
Recipe:
For the sponge:
250ml sunflower oil
4 large eggs
225g light muscovado sugar
200g peeled and grated carrot
300g self-raising flour, sifted
2 tsp baking powder
1 tsp ground mixed spice
1 tsp ground ginger
75g walnuts, shelled and chopped
For the icing:
100g softened butter
300g full fat cream cheese or mascarpone cheese (I used Philadelphia)
100g icing sugar, sifted
A couple of drops of vanilla extract
1. Preheat the oven to 180°C/160°C fan oven/350°F/Gas 4
2. Grease and line two 8 inch round tins and set aside
3. Mix the oil, eggs and sugar in a bowl and mix until well combined
4. Fold in the grated carrot
5. Sift the flour, baking powder, mixed spice and ginger into the mixture, and mix until well combined.
6. Mix in the walnuts
7. Place the cakes in the oven and bake for approx. 25-30 minutes
8. Once baked (check this by inserting a cake tester or knife into the middle of the cakes and checking they come out clean), leave in the tins to cool for ten minutes, then turn out onto a wiring rack to cool completely
9. Once the cakes are cooled, beat the butter until very soft (this is very important! If the butter is not soft enough it will not combine with the cream cheese. I have thrown away two batches because I didn't do this)
10. Mix in the cream cheese a little at a time until fully incorporated.
11. Sift in the icing sugar and combine slowly. Be careful not over mix as this runs the risk of the icing becoming too runny.
12. Place the first layer of the cake (flat side down) on to a board or cake stand and 'glue' the base to the board/stand with a little of the icing so it doesn't slide about
13. If your sponge is raised in the middle and you want it flat, carve off the top with a bread knife.
14. Add some of the icing to the middle of the base cake and smooth out to the sides with the back of a spoon or a spatula
15. Repeat the carving process if necessary on the second cake half, and place on top of the icing so the flat side is upwards. This will give a flatter area to work on.
16. Repeat the icing process as above and sprinkle on walnuts.
Enjoy with a hot cuppa!
Happy Baking.
Saturday 8 March 2014
International Womens Day - The ones I look up to

I found out after browsing Facebook in bed this morning (standard), that today is International Women's Day (IWD), a day that celebrates achievements of women and recognises the suffragettes campaign for the right to vote. It also addresses the changes that need to be made around the world with regard to female and male inequality.
I'm not about to get all feminist on you, but thought I would write a post on the women who inspire me most and who I look up to. It all might be a bit cliche, but that's fine.
1. My Mum - my ultimate female bestie. Always there for me with an ear and advice and a general chit chat, she is my go to woman! She only relies on herself and will support us through thick and thin.
2. My Maternal Nan - My Nan is almost 80, but is a complete trooper. She'll stay up late, can text super fast, has a Facebook page and still knows how to have a good laugh (especially when all her daughters are staying over the night for late night wine and laughter ). She lost my Grandad a couple of years ago and I don't know how she managed to get through so well. It completely devastated me so how she did it I do not know. She also makes the best gravy ever!
3. My Paternal Nan - My Dad's Mum never took life too seriously and (along with my Grandad) taught me that love should be full of laughter. She also always had a goodie box full of chocolate and made the best mushy peas. Unfortunately we lost her a year after my Dad's dad, but she was never the same without him. Although I miss her, I'm glad she is safely back with my Grandad.
4. My Great Aunt Brenda - Purely because she makes the best cakes, and a party without her input is just not the same. Maybe she'll make a raspberry pavalova for my party? Maybe that's a bit cheeky?
What women in life do you admire?
*Image taken from Google
Tuesday 4 March 2014
Decorated Cookies
I'm a fan of decorated cookies and have made them as wedding favours for friends and family. I think they are something a little different (although they have started growing in popularity in the UK) and they can be completely personalised to someones big day, whether in a traditional style or not. I usually cover my cookies in fondant icing but I would really like to start using royal icing as well. You can do so many different things with fondant and royal icing, but royal takes more time, effort and persistence.


I have also made decorated cookies for birthday parties, such as the pirate cookies below, which I think turned out really cute. Decorated cookies are really versatile and can be made for any occasion, making them great favours, treats and gifts.


Saturday 1 March 2014
Flourish - A Year in the Making
Having suffered on and off in my twenties with anxiety, I like a good self help book every now and then. I'm determined to not let this 'invisible' disorder affect me going in to my 30's and in order to do that there are a few things that I need to change, i.e. the way I eat, the amount of exercise I do, organisation skills etc, all of which can contribute to a decrease in the feelings and emotions anxiety give you. I'm not about to give a lecture about how anxiety has affected me over the years or how it needs to be recognised as a real thing, because that's no fun, but I am going to share a new book I have found, called 'The Flourish Handbook'.
This book aims to take you on a journey over the course of a year, breaking down month by month an area of life to concentrate on to enable you to flourish as a person and create the best you. I always say I am going to do this and going to do that, but I don't really have any structure, anything pushing me, and this book will help me with that. Sometimes you just need a plan and a structure to help you through.
The month by month categories are:
Month 1 - Create an enabling environment
Month 2 - Generate more energy
Month 3 - Harness your mind power
Month 4 - Create a meaningful life/career/business with purpose
Month 5 - Sourcing engagement and enjoyment
Month 6 - Be mindful and practice mindfulness
Month 7 - Make family relationships
Month 8 - Sustaining an attitude of gratitude
 Month 9 - Create a vision and set clear goals
Month 10 - Self-discipline and persistence
Month 11 - Master time management
Month 12 - Plan to flourish
My years journey on the flourish plan starts today, 1st March, and this month I will be creating an enabling environment, at home and at work. I will be arming myself with boxes and bin bags and de-cluttering our space, and I'll be buying a few things to add homeliness and organisation. I'll update at the end of the month and let you all know how I got on. If you want to join me, you can find the book here.
*Image taken from Google
This book aims to take you on a journey over the course of a year, breaking down month by month an area of life to concentrate on to enable you to flourish as a person and create the best you. I always say I am going to do this and going to do that, but I don't really have any structure, anything pushing me, and this book will help me with that. Sometimes you just need a plan and a structure to help you through.
The month by month categories are:
Month 1 - Create an enabling environment
Month 2 - Generate more energy
Month 3 - Harness your mind power
Month 4 - Create a meaningful life/career/business with purpose
Month 5 - Sourcing engagement and enjoyment
Month 6 - Be mindful and practice mindfulness
Month 7 - Make family relationships
Month 8 - Sustaining an attitude of gratitude
Month 10 - Self-discipline and persistence
Month 11 - Master time management
Month 12 - Plan to flourish
My years journey on the flourish plan starts today, 1st March, and this month I will be creating an enabling environment, at home and at work. I will be arming myself with boxes and bin bags and de-cluttering our space, and I'll be buying a few things to add homeliness and organisation. I'll update at the end of the month and let you all know how I got on. If you want to join me, you can find the book here.
*Image taken from Google
Tuesday 25 February 2014
It's a small world....
Before you think nooooo please don't get that song embedded in my head for the next hour, I am not about to sing you the "It's a small world" Disney ride tune (though I bet it's playing in your head now anyway, it is in mine, damn it!). I am however going to tell you a short story that lead to me writing this post (You can see an even shorter version on the Project 365 page).
I started working for my company a couple of years ago and my friend and colleague (boss) often talks about her group of girlies, naturally. I thought nothing of it other than that she was telling me about what they had done at the weekend or plans they were making. After some time, I noticed that one of her friends had some other mutual friends of mine. They turned out to be two of my great uncles. Usually I'm quite a good detective and I love to delve and solve things, but on this occasion I sort of just shrugged it off.
Later on, another great uncle of mine had visited from Australia where he now lives and a relative had put a note on Facebook to say how nice it was to see him and some other relatives who had been there. One of these people was my friends friend. By now I'm thinking that this a little weird, so I asked one of my great uncles who told me that in fact this lady was my third cousin, or my Mum's cousins daughter, meaning that our grandparents are brother and sister.
You might wonder how we had never met before, or even knew that each other existed, but when your grandparents are one of ten siblings you can imagine how easily a family spreads to all corners of the country and even the world. We did however meet last weekend at my friends birthday and we talked who's who in the family, who we are regularly in contact with etc, which was really lovely.
A major point of this story is that you never know who you are going to meet and who you are going to meet people through. If it wasn't for my friend, I may never have met my third cousin, and that would have been a real shame.
Sunday 23 February 2014
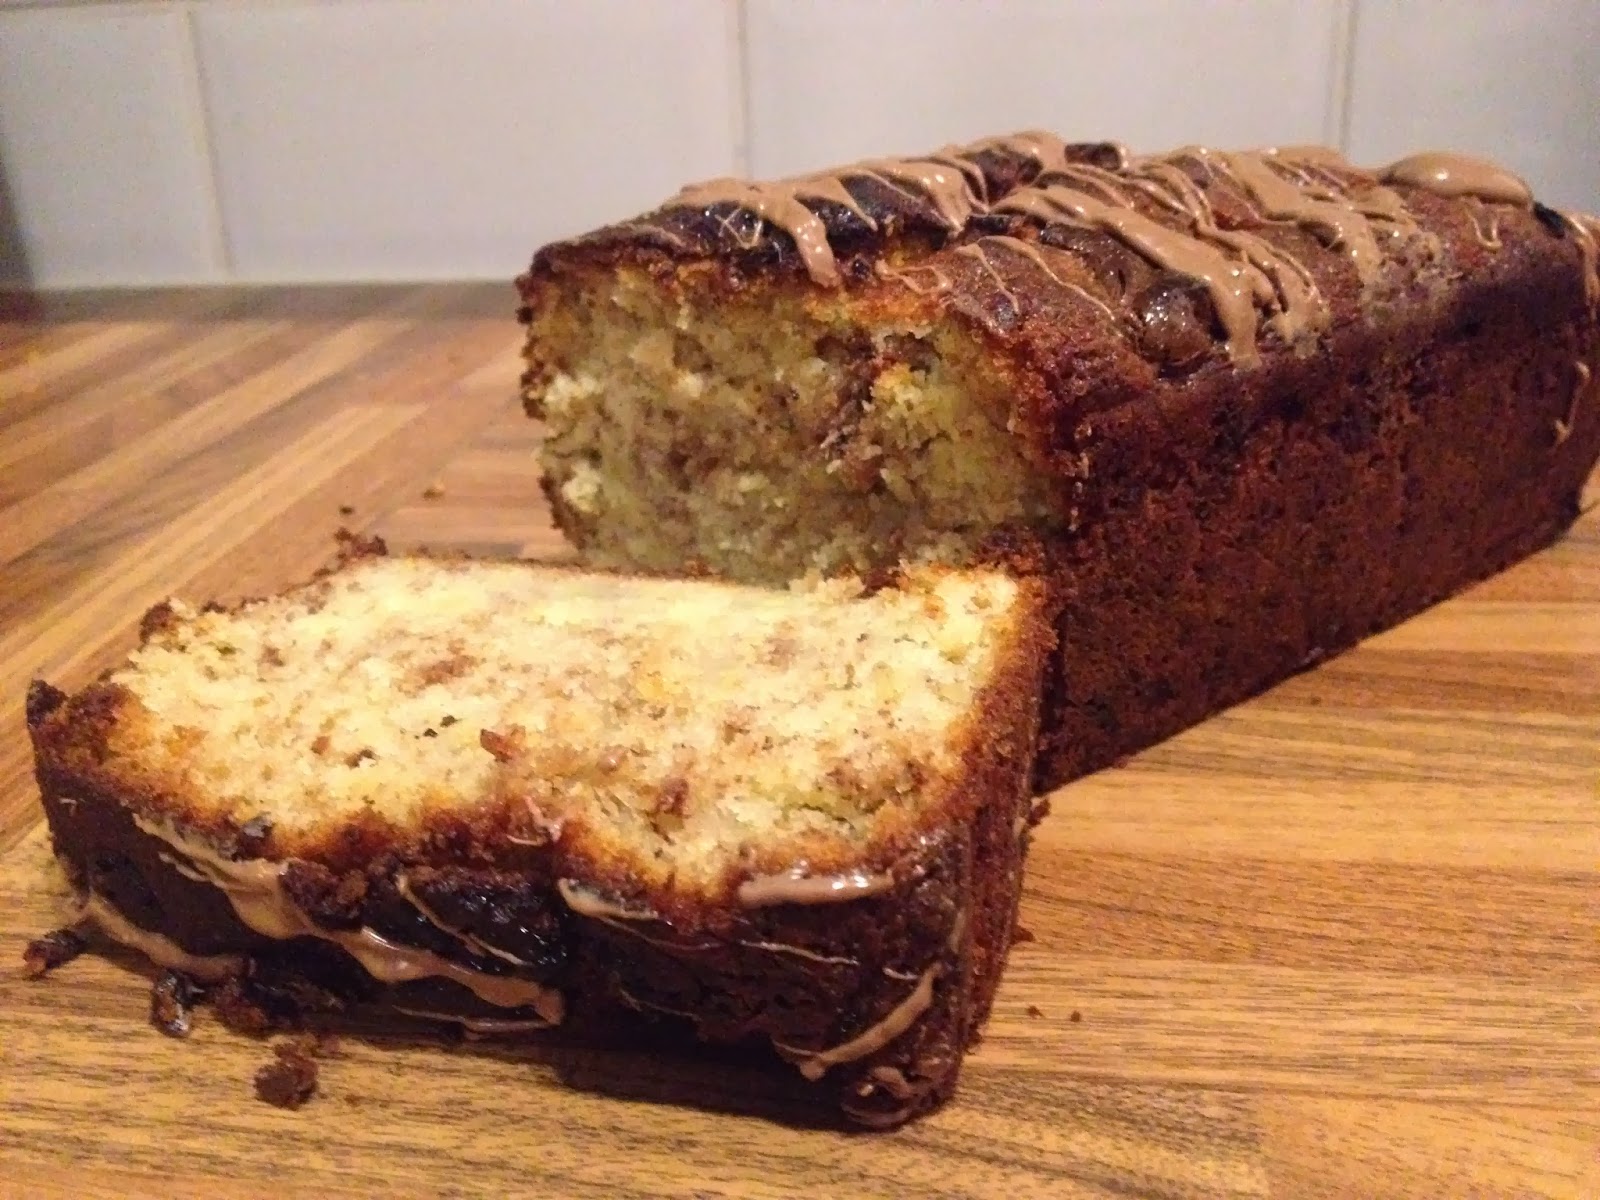
Banana and Chocolate Bread (incl. recipe)
When there are bananas that are too far gone to be eaten and enough ingredients in the cupboard, it would be rude not to make some sort of banana bread. I've made it a few times so this time I thought I would add a chocolate twist. Ok so a banana and chocolate bread is nothing original, but I fancied it.


Recipe:
225g self raising flour
Pinch of salt
1 tsp baking powder
115g unsalted butter
200g caster sugar
2 eggs
3 mashed bananas
Splash of milk
100g chocolate (I used Galaxy but you can use whatever suits your taste)
1. Preheat your oven to 160 celsius / 325 farenheit / Gas Mark 3, and line your tin with baking paper.
2. Melt 2/3rds of the chocolate in a bowl in the microwave, stirring every 15 seconds to ensure the chocolate doesn't burn. Set aside.
3. Mix together the butter and caster sugar until light and fluffy.
4. Lightly whisk the eggs and add to the mixture a little at a time, beating after each addition of the eggs. If the mixture begins to curdle, add a little sifted flour.
5. Mash the bananas and stir in to the mixture, along with the milk.
6. Sift the flour and baking powder into the mixture and combine.
7. Drizzle the melted chocolate in to the mixture and stir lightly so you get a swirl effect .
8. Pour the mixture in to the tin and bake for approximately 1 hour (this may vary slightly depending on your oven. Mine can be a little temperamental). Check the bread is cooked by inserting a skewer and checking it comes out clean.
9. When cooked, leave for a few minutes in the tin then turn out on to a cooling rack.
10. Melt the remainder of the chocolate and drizzle over the top. Either cut straight away and eat warm or leave to cool and enjoy later.
Happy baking!
Thursday 20 February 2014
Follow Us
If you're enjoying what you're reading over here at Polka Dotted Tiffany, why not follow us. There are various ways you can do this:
Google Plus - Just sign in to your account, find the blog and follow.
Email - Add your Email address in the box to the right and hey presto, updates to your Email account!
Bloglovin' - Bloglovin' is a great site if you are an avid blog follower. All you need to do is create an account and find the blog. You can follow as many blogs as you like and add your own for others to find you. Bloglovin' will then send you daily updates on all the blogs you follow.
You can also find the link here: <a href="http://www.bloglovin.com/blog/11814719/?claim=hm4errg6hsg">Follow my blog with Bloglovin</a>
Facebook - You can find us on Facebook at https://www.facebook.com/polkadottedtiffany - every time I make a post I add the link to the page, and I'll also add a few extra snippets here and there.
I hope you will follow the blog and enjoy reading.
Wednesday 19 February 2014
A Valentines Trip To Venice
This Valentines weekend, Paul took me to the beautiful city of Venice. Unlike anywhere else I have been before, I pretty much started falling in love with it. The scenery is beautiful, the food is great and the people are lovely. What's not to like?
We stayed for three nights in the lovely UNA Hotel in the Cannaregio district and we had a room upgrade upon arrival. I have never been upgraded before! The hotel was beside a canal (obviously) and was in a quiet residential area a short walk away from the main sights, restaurants and shops.
We arrived at our hotel late afternoon/early evening and went straight out for dinner in St.Marks square. We had one of the best steak meals I have ever had (Steak with mustard potatoes) and of course cocktails, including a Bellini. You can't go to Italy and not have a Bellini. Or a glass of Prosecco (which I drunk various times over the weekend).
Sunday was my favourite day. We had breakfast at Cafe Florian on St. Marks Square - expensive but worth it and the cafe is beautiful inside. We visited St. Mark's Basilica, St. Mark's Campanile (or the Shard of Venice as I called it) and the Doges Palace. We drunk by the canal, ate Gelato and ate dinner later on again by the Rialto Bridge.
On the last day we had the morning before leaving for the airport. I love airports but I didn't want to leave Venice. We went to a local Patisserie and joined the locals in eating breakfast and drinking coffee, though I'm not sure how many people eat a pastry then a pizza!


We stayed for three nights in the lovely UNA Hotel in the Cannaregio district and we had a room upgrade upon arrival. I have never been upgraded before! The hotel was beside a canal (obviously) and was in a quiet residential area a short walk away from the main sights, restaurants and shops.
We arrived at our hotel late afternoon/early evening and went straight out for dinner in St.Marks square. We had one of the best steak meals I have ever had (Steak with mustard potatoes) and of course cocktails, including a Bellini. You can't go to Italy and not have a Bellini. Or a glass of Prosecco (which I drunk various times over the weekend).
 |
| Bellini |
 |
| Best Steak Meal Ever! |
 |
| Beautiful Decoration in the Restaurant |
On the second day we visited the Rialto Bridge and fish market and all the other stalls selling Venetian souvenirs and other items. We also had breakfast by the bridge overlooking the canal. We then moved on to the Accademia and Peggy Guggenheim art museums. These museums were very different in the types of art they have, The Accademia being more older art relating to the church and The Peggy Guggenheim museum focusing more on modern art, such as Picasso and Dali. Unfortunately we weren't allowed to take pictures inside these museums. We also did a lot of strolling, found a great pizza place and ate crepes.
 |
| The Rialto Bridge |
 |
| Breakfast by the Canal |
 |
| Pizza! |
 |
| Inside Cafe Florian |
 |
| Inside Cafe Florian |
 |
| Cafe Florian Breakfast |
 |
| St Mark's Basilica |
 |
| Inside St. Mark's Basilica - Beautiful! |
 |
| View From St. Mark's Basilica Balcony |
 |
| St. Mark's Campanile |
 |
| View of Venice from the Top of St.Mark's Campanile |
 |
| View of Venice from the Top of St.Mark's Campanile - St. Marks Basilica |
 |
| View of Venice from the Top of St.Mark's Campanile - The Doges Palace |
 |
| View of Venice from the Top of St.Mark's Campanile |
 |
| Gelato! |
 |
| Pistachio Gelato |
 |
| Dinner by the Rialto Bridge and Grand Canal |
On the last day we had the morning before leaving for the airport. I love airports but I didn't want to leave Venice. We went to a local Patisserie and joined the locals in eating breakfast and drinking coffee, though I'm not sure how many people eat a pastry then a pizza!
 |
 |
Venice was a beautiful place, which I would describe as a toy town but in real size with real people and we definitely want to go back. If I could give anyone one piece of advice, it would be wear comfortable shoes. We walked a lot and got lost once or twice (which I'm told is very easy in Venice) and although it didn't matter because we enjoyed looking at the scenery, our feet took the brunt! I also loved looking at the masks in the little shops and drinking coffee in little coffee shops along the streets. I would highly recommend visiting Venice. Just make sure you take those comfortable shoes and be prepared to spend. Here are a few more snaps from around the city.
 |
| Pasta |
 |
| Giant Meringues |
 |
| Venetian Mask |
 |
| Venetian Masks |
 |
| Loved This! Think it was Street Lighting. I Want One! |
 |
| Latte by the Canal - It's all about the Froth |
 |
| Another of the Rialto Bridge |
 |
| Loved these Ball Outfits |
 |
| Venetian Masks |
Subscribe to:
Posts (Atom)